Easy Countertop Remodel

I wanted to change the color of my countertops from the dark green to a lighter color. After looking around at options, I found countertop contact paper to be the best option! As always, I jumped on YouTube first to see how do-able this would be to DIY. It seemed easy enough.
I purchased the contact paper on Amazon [ link to what I purchased here ]:
Once I received the paper, I started with a small section to test out what it would look like and to see how hard it was going to be to work with. I tested it out on the small bedroom bedside table, realizing that my tiny hairdryer wasn’t going to be enough heat to really stretch and make it work on the rounded corners (a heat gun it is!).
As I began to section out the kitchen countertop, I quickly realized it was going to be much easier to do if I removed the stove top and kitchen sink fixtures. So, I opened up YouTube and sorted how to remove those.
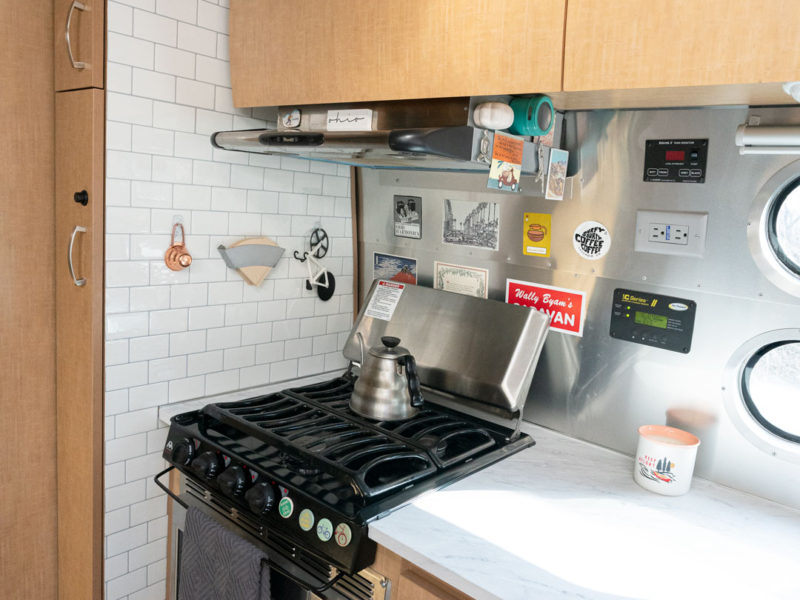
Now with a flat surface to work with, I unrolled the contact paper and got to work. The best part about this paper is that you can re-apply it many times in order to get it aligned perfectly. I covered the length and width of the countertop easily with one sheet. The only part I had to overlap was the extended rounded sink section. With enough paper left, I was able to leave enough paper to truly heat and pull this around the rounded section flawlessly. This was by no means an easy task. It was very tedious and my fingertips hurt from pulling and heating! But if you take your time, you can truly get a perfectly covered countertop with the contact paper. As for the fixtures, I used an exacto knife to cut along the edges. Thankfully the stove and sink extend over the counter, so this didn’t have to be wrapped underneath. I went through and heated the paper that attached to the underside and smoothed everything out to ensure everything was intact and going to last! After everything was smoothed out, I placed the sink, fixtures and stove back in place.


I also removed the side table and applied contact paper to it as well. This was probably the hardest part to cover even though it was a small section and a rectangle. Without having it attached to anything, I found it hard to get a good grip to pull and stretch the paper around the corners (maybe having someone else hold it would be useful! I was doing this late at night and no one was awake lol).
All in all, I am super happy with how this turned out! I am a perfectionist when it comes to how something looks, and I honestly can say it turned out better than I even thought. It definitely takes patience but it’s worth it!
If you have any questions feel free to shoot me a dm on instagram @tincanadventure 🙂